This is the third of four methods to change the default Genesis favicon for a WordPress Genesis theme. Method 3 uses the Control Panel for your website. Logging into your Control Panel depends on your hosting provider. You will need your username & password for access.
- Log into your Control Panel (CPanel)
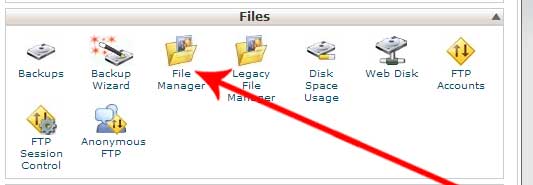
- Open the File Manager. The image for the file manager is located under the section Files. You can usually find that section about 1/3 down the page.

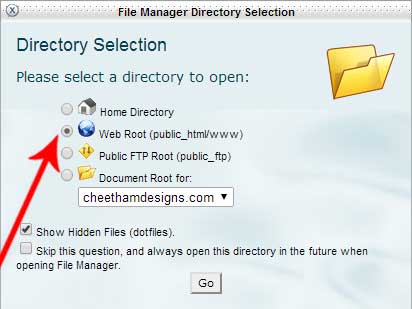
- You have an option of where you want the File Manger to open but to keep things easy select open the Web Root (public_html/www).

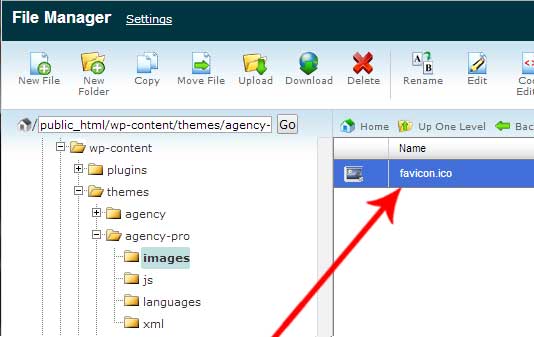
- Open the public_html/wp-content/themes/your-child-theme/images. Replace your-child-theme with the name of your installed child theme.
- Click on the favicon displayed in the folder in the right window.

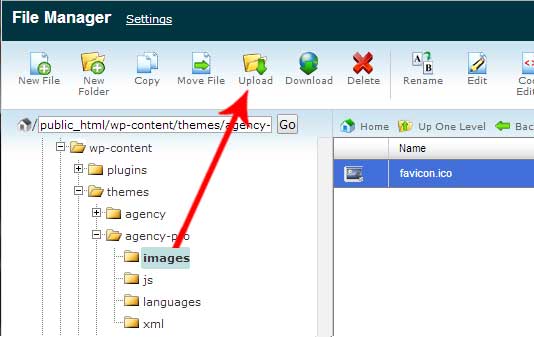
- Click on Upload from the menu at the top of the screen.

- Click on the Choose File button and select your favicon
- Click YES to replace.
That is all. It might take a few hours for your favicon to show.